In the LTM module, “nodes” (a server represented by its IP) are grouped into “pools” which contain “pool members” (a node plus a port). “Pools” are bound to “virtual servers” (VIPs) which define how the BigIP should behave when it receives traffic for a particular destination. GTM on the other hand, consist of “wide-IPs” in lieu of “virtual servers”. You can think of a wide-IP as an IP that spans entities (be they individual servers or physical sites). A popular strategy is to combine BOTH LTM and GTM with LTM VIPs being what GTM “stretches” with its Wide-IP.
Securing the Management Interface
F5’s management interface itself should be secured via a trusted SSL/TLS certificate.
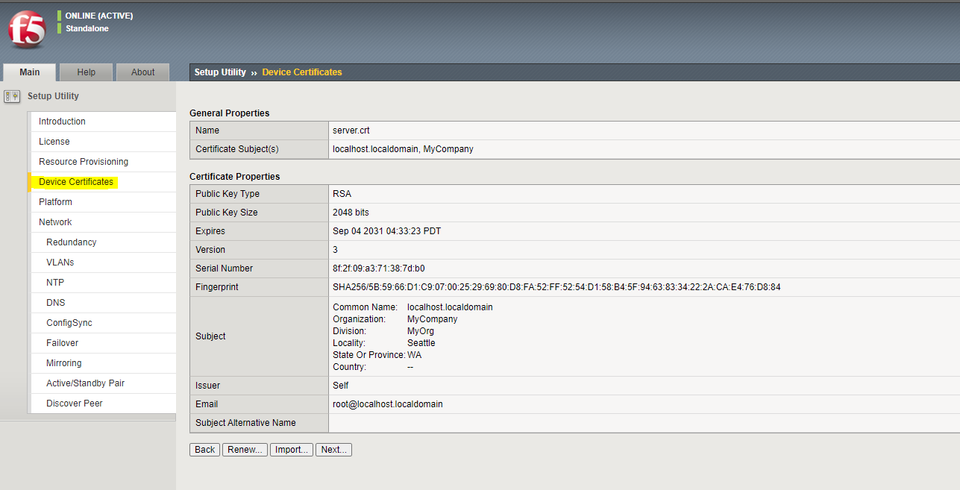
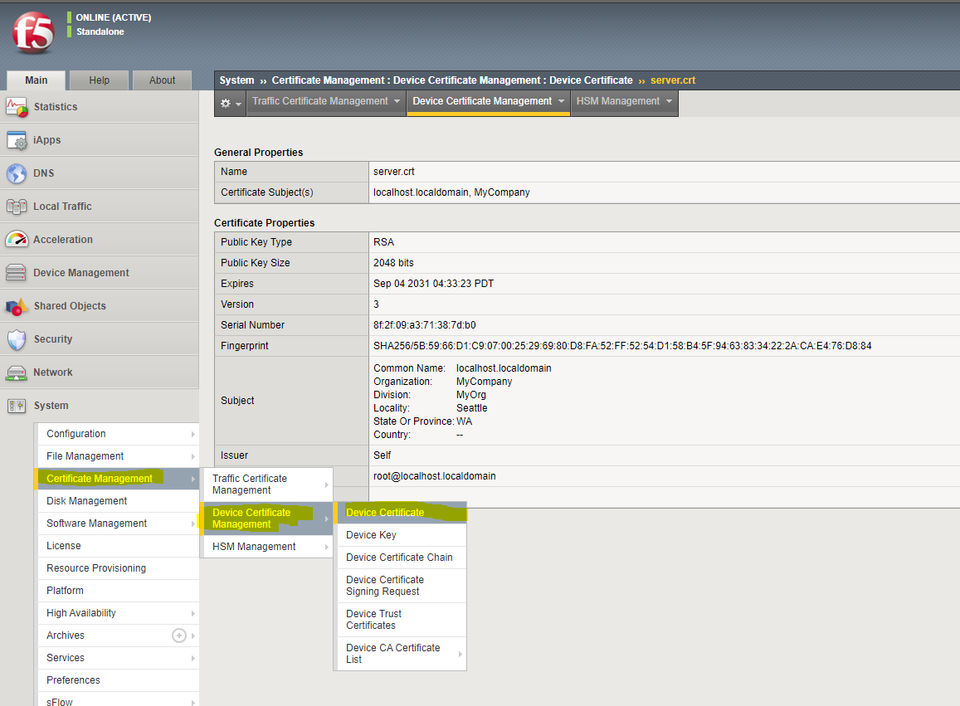
This can be configured under Setup Utility -> Device Certificates during initial setup. After initial setup, this can be found under certificate management -> device certificate management -> device certificate.
Select “Import”, and you will be taken to a screen where you can upload a public/private keypair. You can choose between either “Certificate and Key” which will allow you to upload a separate certificate and key in Base64 format (no binary certs here!)
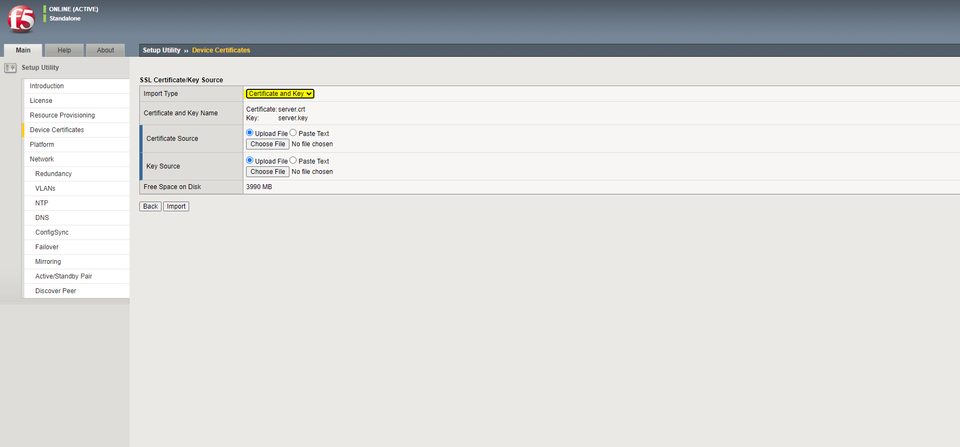
Or, alternatively, if you would like to generate your CSR on a windows machine, import the response, and export a .PFX file (PCKS#12), the F5 will also accept this format.
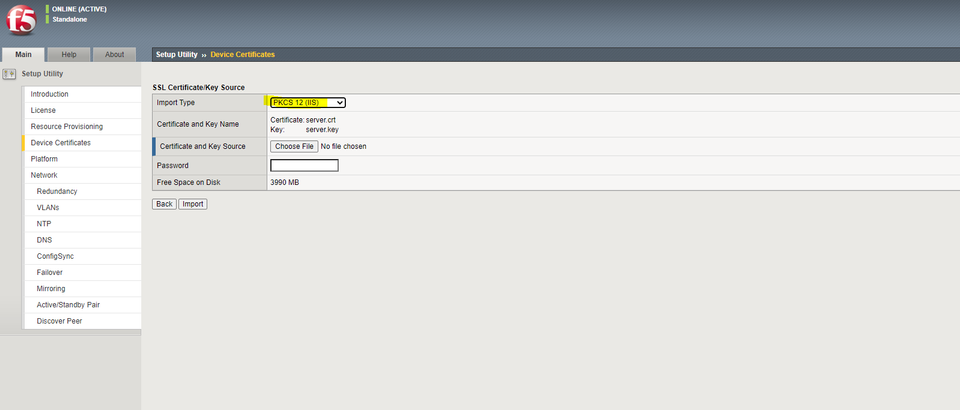
After selecting your valid certificate to apply and refreshing the page, the F5 will serve the management interface using your new certificate pair.
SSL/TLS in LTM
In F5’s LTM, SSL/TLS certificate options are a facet of “SSL Profiles” which can be defined under Local Traffic -> Profiles -> SSL. From here we can choose to create either a “Client” or “Server” profile.
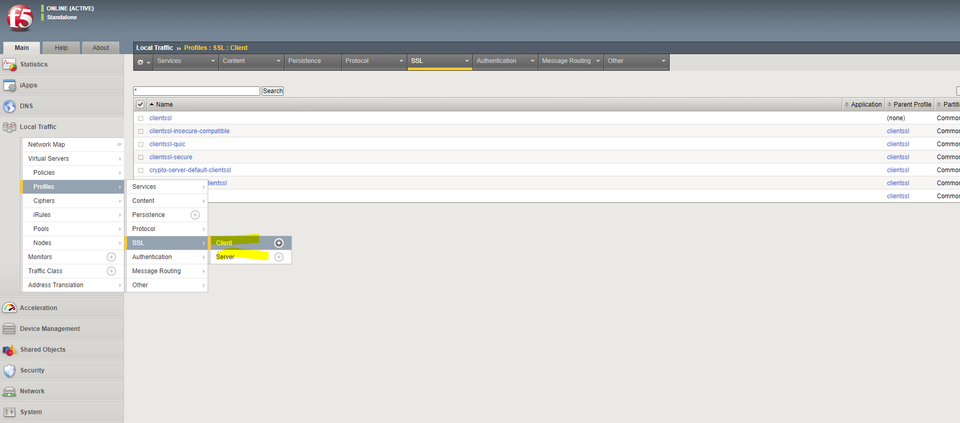
The “Server” vs “Client” nomenclature in the F5 can be confusing for beginners. This is because during your typical terminating TLS proxy, the proxy fulfills the role of BOTH the client and server at different points in the request’s lifecycle!
Client profiles define what the F5 serves to inbound requests. Server profiles on the other hand define the behavior when the F5 goes to talk to the “real” server. The f5 is engaging in an intense game of mimicry, simply posing as the client from the perspective of the server, and the server from the perspective of the client. It is of course possible to terminate traffic at your enterprise edge and forward traffic to real servers over plaintext such as HTTP, but this is ill-advised.
Client and Server profiles are “linked” to virtual servers to define how they behave.
Creating a new Virtual Server
First, ensure a pool has been created and linked to your appropriate backing nodes. If needed, Nodes can be created under “Local Traffic” -> “Nodes”, and pools can be created under “Local Traffic” -> “Pools” respectively. We will need to select the pool from the virtual server.
Now, you will be presented with the following. Highlighted are the commonly used options in a standard configuration:
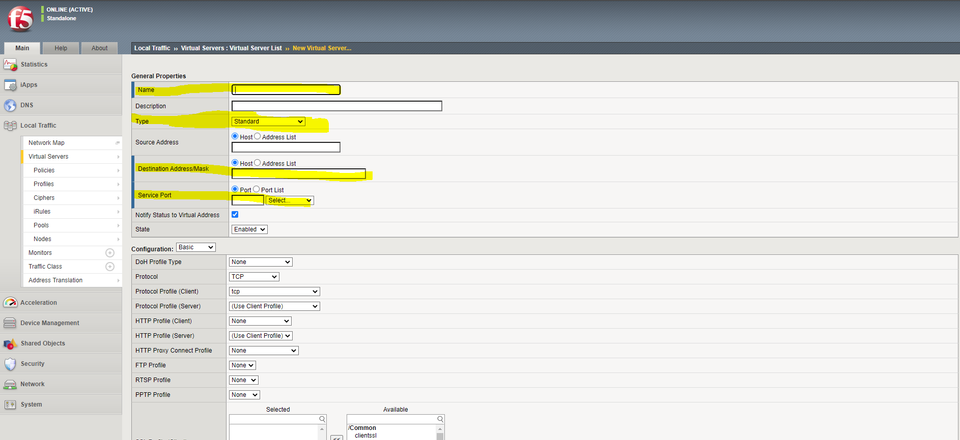
Give your Virtual Server a human readable name.
Type is where we determine whether the Virtual Server will act as a terminating or non-terminating proxy. A VIP of type “standard” will terminate any SSL/TLS traffic it receives and re-terminate based on what is configured under “SSL Profile (Client) below. Note that this is lower down, and different from “HTTP Profile” pictured.
Performance – Layer 4 allows for your virtual server to act as a non-terminating SSL/TLS proxy. Really all this means is that the backing client is directly responsible for termination and the F5 passes the encrypted traffic as-is.
Please note that your choice of load balancing strategy (type) has an impact on your ability to utilize sticky sessions. Research carefully before deviating from “Standard”!
The Destination Address should be an unused IP in an address space the F5 is responsible for. It can be any IP at all, the F5 will assume this F5 on the network. This is the address any DNS entry created for the service should point to – this is the IP which will host the service backed by one or more pool members.
The Service Port is the port which will listen for connections on the Destination Address. For HTTPS for example, choose 443. This does NOT have to be the same as the port chosen on the backing pool. There is nothing preventing traffic from being received on port 443 to your virtual server and terminating to port 8443 on the “real” servers.
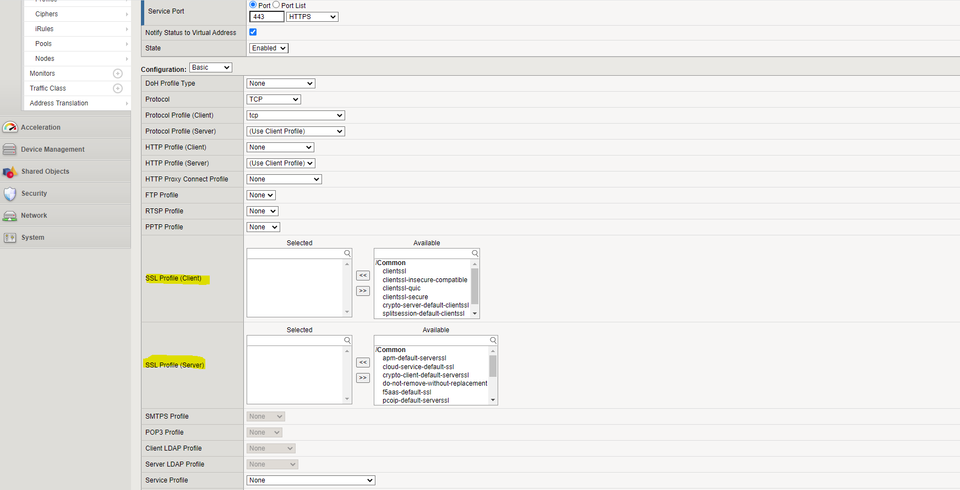
Here we will choose our SSL Profile for client and server.
The Client profile is usually custom, and created with a valid SSL/TLS keypair for the DNS name used to access your virtual server. Oftentimes, a wildcard certificate will be used for this purpose and the profile reused across multiple virtual servers. Under “advanced” configuration on the client SSL profile, we can also define which ciphers are supported for virtual servers linked to the profile!
The Server profile is usually set to “serverssl” which will validate that the F5 can construct a valid chain to the certificate served by the real backing server. In lab environments where self-signed certificates are sometimes used, “Server-insecure-compatible” will skip these checks. In the “Server” profile, we can also specify a host header for SNI purposes. This allows us to host multiple discrete services on the same backing server’s IP + port combo.
F5 GTM and SSL/TLS
It is worth noting that F5’s GTM has no concept of SSL/TLS, since it is a purely DNS-based load balancer. It works by responding to DNS queries in a strategic way to route traffic for a given hostname to a completely different IP. As such, SSL/TLS is not terminated – it is always handled by the backing server.
Conclusion
F5’s BigIP is a powerful and popular load balancing platform. While it can be confusing at first to securely configure the load balancer to behave in the way we expect, once you get the hang of it is one of the most stable options out there. While open source solutions such as HAProxy are catching up in terms of feature set, they lack the professional polish and world class support that F5 offers for its product set.
Discussions and Comments
Click here to view and join in on any discussions and comments on this article.